Found It on the Internet Friday #12
February 3, 2012 § Leave a comment
A quickie, because it is late and I am tired (and it’s actually Saturday and I still need to take pics so it’s going to be even later on Saturday by the time this gets posted and as it turns out that was last week and I never did take the damn picture so here it finally is yeah, I typed that before I took the picture and then never did…seriously it’s been like a month now but I really did finally take the picture). A couple of weeks before Christmas, I came across this great post on Pinterest about making snowflakes (which is awfully fun anyhow) out of junk mail. I get about a bajillion catalogs every week, especially at this time of year, so I decided to use those. The kids absolutely loved it. In fact, a couple of times Becky asked if we could cut out snowflakes instead of watching TV. (!!! Yes, yes we can.) They’re both still pretty young and not that confident in their cutting skills, but here’s what we ended up with:

There is a giant grocery bag full of these. The kids cut them faster than I could fold the pages for them. They're still asking to make snowflakes these days, too, and starting to do more recognizable shape cutouts, which is very cool to watch.
Found It on the Internet Friday #11
January 13, 2012 § Leave a comment
Look at my pretty fairy lights!
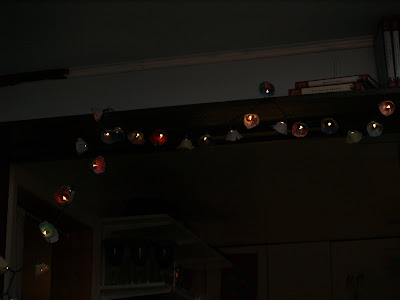
They make me so happy!
I came across this on Pinterest and decided it would be a great project to do with the kids. I was not wrong. They did all the painting, and I did the cutting and hole-poking. One tip: paint first, cut the egg cartons apart later, especially if you’re working with small children. These were super easy and now I want them all over my house.

I gave the kids free rein with the colors -- no two are alike.

Some of them are even sparkly!
Found It on the Internet Friday #10
October 28, 2011 § 1 Comment

Look, it's a long post and I don't tell you what this is until the end. But trust me, it's delicious.
I don’t like seafood, as a general rule. There are a couple of exceptions, namely fish & chips and New England clam chowder (really though, I think this applies to most food: if you deep fry it or drown it in cream sauce, what’s not to like?), but really, I just don’t like seafood. I really, really want to, though. So often I see an amazing looking picture or read a description that makes my mouth water…it seems a shame to just dismiss all that yumminess out of hand. So lately I’ve been on a quest to find ways of consuming seafood that don’t involve deep-frying or cream sauce.
When I first started this journey, a little over a year ago, I had the good fortune to be invited to a cajun dinner party, and I was determined to try a little of anything I wasn’t allergic to (bell peppers — give me contact sores. Good times.). Of course there was a lot of seafood, but much of it was in stews and so forth, so not particularly noticeable. The two things I did try that were definitely seafood-y were shrimp grilled with andouille sausage slices and a fun take on Oysters Rockefeller…since I didn’t want any spinach (cooked veggies make me nauseous…I got issues, man) my buddy Dan hooked me up with two bits of bacon, so I had a little bacon-oyster sammie. OMG. Both of these things were not just edible but melt-in-your-mouth delicious.
I’ve tried a couple of other things since then — lobster mac-n-cheese anyone? — and for the most part, have enjoyed them. I’m still a little nervous though, and I’d certainly never cooked fish. Until the other day, when I came across this recipe for Asian Marinated Salmon with Grilled Pinapple on Jolts & Jollies (via Food Buzz). Holy delicious. This one’s definitely a keeper. (See what I did there?)
The only change I made was I used bottled pineapple juice for the marinade and fresh pineapple planks for the grilled pineapple instead of canned rings, and I used an indoor stovetop grill instead of an outdoor grill because it was rainy as hell the day I made it.
Found It on the Internet Friday #9
October 21, 2011 § 1 Comment
Love, love, LOVE these skirts! The ease of a circle skirt without the bulk at the waistband/belly area (because really, who wants that?). So far I’ve made two, with two more cut out and ready to be sewn. This one is totally my favorite:

Clearly, this one make me feel fun and saucy.
I also have one that’s a little longer, made of the same solid red that’s the waistband on this one. The two to make are a purple raw silk and another print, this one with a black waistband. And I’m sure there will be more when those two are done…these are so easy to make and look great on. The one big change I made is that I didn’t bother with the buttonhole. Not because I was being innovative, but because I couldn’t find my buttonhole foot for either of my sewing machines. I’m not fond of sewing buttonholes by hand, so I tried the all-but-buttonholed skirt on and found that it looked great just twisted over (where the inside edge meets the top, bring the bottom sash end up over the top and just keep wrapping). Since that made the skirt even easier, I plan to keep doing them that way.
- Original idea found at Simple Simon & Co.
- Additional useful tutorials at Made, Ruffles and Roses, and Bored and Crafty
Found It on the Internet Friday #8
September 23, 2011 § Leave a comment
I’ve had this done since Tuesday and almost forgot to post it! How cute is this adorable crocheted ring? This was my very first one, and it only took me about 30 minutes. I used your basic DMC embroidery floss and a size 3 steel hook, which seemed to be about right.

I need one to go with every outfit!
The instructions for this ring and two others are available on AllFreeCrochet.com — these are so pretty and easy I can definitely see myself making more! This is ring #1 in the instructions, BTW. The only “issue” is that you haev to remember to take them off when you wash your hands or they get all damp and squishy and feel yucky (once they dry they’re right as rain, so not a big deal if you forget!).
A note on choosing hook size…my very scientific method for this if I don’t have any idea what I’m going for is to — careful, technical term coming up here — guess. You can usually tell as soon as you start chaining if you need to go smaller or larger. Don’t be afraid to play around and switch it up until you find a good match for your yarn, especially on a project like this, where gauge is definitely not of the essence.
Found It on the Internet Friday #7
September 9, 2011 § Leave a comment
I’ve been meaning to make some of these for awhile now, and the ginormous tshirt I received at the annual company picnic was perfect:

Big bag o'stuff!
This is a super easy no-sew project — you can find the tutorial I used here. My shirt was so big that I ended up doing four loops on the bottom, and I chose to leave my bows hanging out:
Bag bottom
So much stuff fits in it, and it is much, much sturdier than I expected it to be. I see a lot more of these in my future!
Found It on the Internet Friday #6
September 2, 2011 § Leave a comment
Yikes! Missed a couple weeks, didn’t I? I’ve been crazy busy — tell you all about it later. But for now, meet this week’s FIotI:
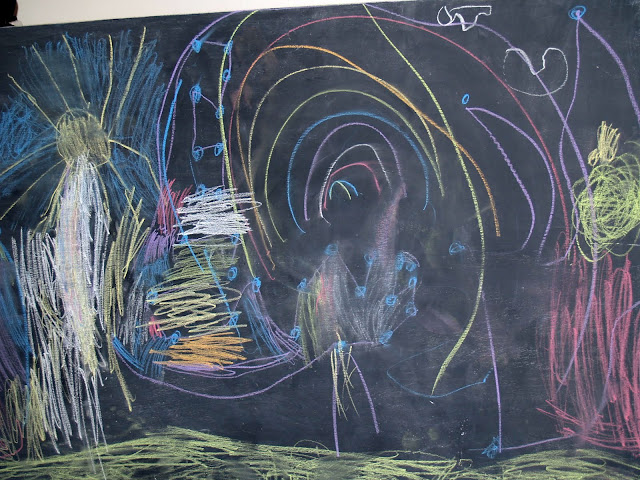
Artist credit goes to Becky and Zack
I don’t actually have a link to a particular project on the internet that inspired me for this one, but I’ve been seeing custom-made chalkboard surfaces of all varieties all over Etsy and assorted wedding blogs* and of course Martha Stewart (who has this nifty recipe for making your own color — how cool is that?).
So. This isn’t your run-of-the-mill little chalkboard. No, this is a door, painted with chalkboard paint. I thought about doing the aforementioned MS color-mixing thing, but I didn’t have a particular color in mind and for the amount of paint I needed, it was cheaper to just buy the quart of black (incidentally, they do now have a tint-able one available, but the color choices are limited).
Why a door, you ask? Well, I was using two of them for desk surface in my studio, and when I rearranged a few weeks ago I decided one was enough and I could use the other wall space more efficiently. So I had an extra one hanging around. They’re super-cheap, though — these are the interior hollow-core doors and run $20-30 depending on the width you get.

Those are Zack's legs, just to give you a sense of scale.
The painting itself was really easy — I “primed” with some extra trim paint I had laying around and then threw on two coats of the chalkboard paint. I went over it with the white chalk as instructed on the packaging to give it a “dust base” and then turned the kids loose on it with the multi-color chalk. Right now I’ve just got it on the floor leaning against the wall, but as they grow I’ll probably hang it for them. And I have a bunch of the paint left over, so expect to see more chalkboard-y stuff here in the future.

Gratuitous shot of adorable artists.
* No, I’m not planning a wedding. DIY wedding blogs have some of the coolest crafts going, I swear. Don’t give them a miss just because you’re not planning on tying the knot.
Found It on the Internet Friday #5
August 12, 2011 § Leave a comment
For years I’ve had one of those fabric tubes full of plastic bags hanging on my wall, and while it’s certainly a better way to store the damn things than just shoving them into a drawer (or tossing them and getting new ones all the time)*, it’s still kind of bulky and unsightly. So when I came across this post with some alternates and saw the repurposed household wipes container, I was all over it.
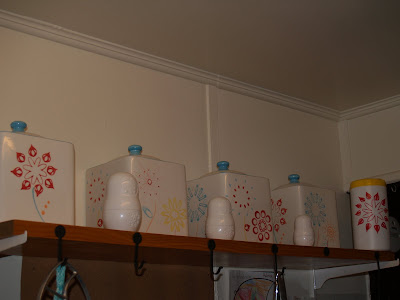
Like it was always there!
I dried out my empty container, shoved a bunch of bags in, removed the label, and made pretty designs with my sharpies, to match my other kitchen accessories. Sadly, I forgot to take pictures, so you’re going to have wait until tomorrow to see it. But it fits so nicely on a shelf — I’m thrilled with it. AND, now when we go to BJs and need a bunch of bags, I can just grab that container and throw it in the car. Heck, I might even make a second one just to keep in the car!

A little closer
*Yes, I know I should be using cloth etc. bags, and I do try my best to a) remember to take them with me and b) actually take them out and put my groceries in them, but I’m not always successful. And I reuse the plastic bags I do get, as trashcan liners, when I need to transport something messy or to hand something off to someone who won’t be returning my bag to me. So don’t get all up in my grill, yo. Yeah, I know I totally can’t pull off that last bit.
Found It on the Internet Friday #3
July 29, 2011 § 3 Comments
This one’s for the kids!

Flutterbys!
This past week was our company picnic, which is awesomely fun but unfortunately due my current (lack of)mobility issues I knew I wouldn’t get to participate in a lot of the activities. Since I still wanted to be there to hang out with folks and see all the people from the other office and so on, I decided to grab a project small enough to work on in the +90° temps. I’ve been wanting to make a bunch of these for the kids to play with for awhile now, so I sat down and crocheted away. I did try to figure out a good way to set it up so I wouldn’t have to make two pieces and join them, but the ones made separately really did come out better. I actually made a total of 6 (there was a moment of panic when it looked like I’d only made five and the children would have to — gasp! — share, but I found the McGoohan [big nerd points if you get that one] and all was well), but one of the children grabbed hers and ran off cackling gleefully before I had a chance to get a picture of them all together.
Yarn is LB Lion Wool Prints in Autumn Sunset
ETA link to the pattern (oops!): Found it on CrochetSpot
Found It on the Internet Friday #2
July 22, 2011 § 1 Comment
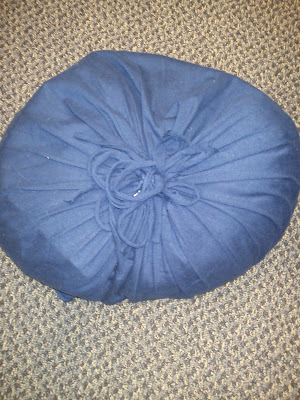
Something has gone horribly, horribly wrong.

This will never be what it's supposed to be. Just not gonna happen.
I found this awesome tutorial for making ojami (japanese bean bags) a couple weeks ago and thought, “Hey, that does look like fun!” So I decided it would be this week’s FIotIF project. It looked simple enough, and really, it probably is. But when you’re too lazy to look up the instructions on your interwebby device and just trust to your somewhat dodgy memory, things can go — and in this case clearly have gone — awry.
Now that I’m looking at the instructions, I clearly skipped, oh, about 7 steps. And also just made up a bunch of stuff. So I’m thinking I’ll try this one again over the weekend, actually following the directions this time. And I think it’ll turn out great. Because again, awesome tutorial. It’s hardly their fault I’m too lazy to follow them.
