Shaking my tree
June 7, 2012 § Leave a comment
I was watching The Next Food Network Star (my third favorite cooking contest show — I much prefer Top Chef and Chopped, but they seem to be out of season right now) the other day, and one of the things they were asking each contestant was to describe their philosophy about food/cooking. So I thought about this for myself, and my philosophy about food/cooking (and about any kind of art, really) is this:
Learn the basics so you can make what you like.
That’s it. With all of the things I do, the ones I’m most successful with are food and fiber. And the reason I’m most successful with them is because I’ve learned the basics and learned them well, and knowing the basics means I can do some very unbasic things to get what I want. This is what has made me comfortable replacing ingredients in recipes (for instance, the black pepper/paprika switcheroo in my Lamb Ragout) and really what has given me the confidence to play around and come up with recipes all my own.
But, you ask, how did you learn this stuff, oh Amazing One? I am so glad you asked. Because here’s the thing: when I say “learn” I don’t mean “follow the recipe a couple times”. I mean, read things in cookbooks, watch cooking programs, ask your friends questions about the delicious food they’ve prepared, think about how the chef made the food that’s on your plate in a restaurant. Always be thinking about what is happening, especially with things you have a strong like or dislike for. And then — and this is really the most important part — get your ass in the kitchen and start playing.
Some of the things you make will fail. If you’re really lucky, they’ll fail spectacularly and you’ll at least get a good story out of the deal but more often, they fail with a whimper and you have a dish that says “meh.” You can learn from those things. Think about what worked and what didn’t, and figure out how to fix the non-working things (ideally in such a way that they don’t break the working things). Then go and make the new version. Repeat, until you have what you wanted, or an entirely new and more awesome thing that has evolved along the way (for really fantastic examples of this in action, I cannot recommend Cook’s Illustrated magazine highly enough).
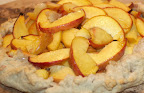
This is the way most of my recipes happen. I get an idea and I go through several iterations until I love it. Sometimes, though…ah, sometimes it’s as if I’m possessed by some sort of mad genius kitchen spirit and everything comes together beautifully and culminates in tastebud bliss. Such was the case with the peach galette I made over the weekend.
The story goes like this: I was at the store and saw some peaches. I grabbed them, and then as I was driving home I started thinking about making mini pies with them. Except I don’t really like fruit pie as a general rule (yeah, I know, I’m a weirdo). Maybe a cobbler? Not exciting me. Then I remembered that I’d been wanting to make a galette. Perfect! Not quite a pie, but yummy crust, so how can that be bad? (A galette, for those of you who don’t know, is a very rustic version of a pie/tart, wherein you roll out a single crust onto a flat baking sheet, put your filling on, then fold the edges up to hold it all in. I call it a “too lazy to take the pie plate out pie”.)
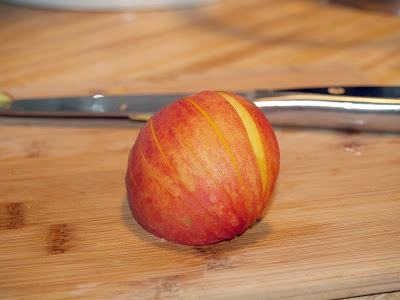
I started out with my regular crust, then decided I wanted it to be a sweet crust, so I threw in 1/4 cup of brown sugar. The peaches were clings (as opposed to freestones…as much as I think clings are a pain to cut they invariably have a much stronger flavor), so I cut them in 1/4″ slices while still on the stone, then popped the slices off. The peel was thin (and I’ve never been able to successfully blanch peaches for peeling) so I left it on.
Oh, and I learned a new fancy trick for rolling out crust: put it between two sheets of parchment!

No more cleaning hunks of dough off my precious marble rolling pin!
I didn’t put any flour on the paper, but I think next time I’d do a dusting as it was a little clingy. The final little spark of genius was the rum-honey glaze that goes on at the end. I was sitting on the couch, smelling the baking smell and slavering impatiently when I suddenly realized that a little glaze would bring it from yummy to exquisite. And indeed, the flavor profile was delicate but still complex. It tastes just like you’d expect early summer to taste.
Ingredients:
For the filling:
- 1 lb peaches (about 4, give or take)
- 1/4 c. sugar
For the crust:
- 1/2 c. butter, cold
- 1 1/2 c. flour
- 1/8 c. brown sugar
- 3-4 tablespoons ice water
For the glaze:
- 1 Tbsp. dark rum
- 2 Tbsp. honey
Crust:
In a food processor, pulse together the flour and butter until the mixture resembles coarse meal. Add in sugar and pulse once more. Begin adding water 1 Tbsp at a time until 3 Tbsp have been added, pulsing as you go. Now add the water about 1 tsp at a time, stopping when the mixture just comes together. Turn out onto plastic wrap and form into a disc. Chill to firm, about 15 minutes.
Filling:
While the crust is chilling, preheat the oven to 425°. Slice peaches into app. 1/4″ thick slices. Roll crust out to 11-12″ diameter and put on cookie sheet. Place peach slices in concentric circles on crust, mounding higher closer to the center. When all slices are placed, fold the edges of the crust in towards the center. Sprinkle sugar evenly over filling. Place in oven and bake for 25-30 minutes, until crust is browned.
Glaze:
When about 5 minutes are left for the galette to bake, combine rum and honey in a small microwaveable dish. Heat together for 20-30 seconds (long enough to fully liquefy honey). Stir gently. When you remove the galette from the oven, use a pastry brush to apply glaze generously to peach slices, making sure there’s plenty to drip down between them. You may wish to apply several coats.
Allow to cool for 10-15 minutes, then slice and serve.
Quick, but still tasty
April 3, 2012 § Leave a comment
Hello, there, my long-neglected blog. I promise to try to get back into the swing of things here, and to start that off here’s a quick tip on pie crust that only just occurred to me to try last night but turned out quite successfully:

Pretty, I think, if a bit rustic.
Instead of trying to do something pretty and decorative with the edging (and wasting a lot of delicious crust in the process!), I just grabbed both layers and folded them up like a galette. Fast, easy, and delicious!
We Have No Banana Today
January 17, 2012 § Leave a comment
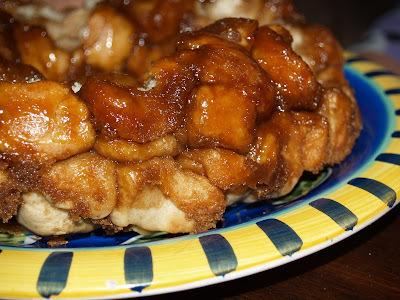
It's so good I failed to take a picture until we'd already eaten most of it. I was busy stuffing my face.
Even Wikipedia doesn’t know why it’s called Monkey Bread. It’s not made of monkeys and doesn’t contain bananas or anything else monkey-related, but it’s definitely delicious. Also, it’s kinda fun to make and totally fun to eat. I used to not make it often, because it’s a yeast dough so it takes a couple hours to make the dough and then another hour or so to prep and bake the bread. And it’s really best fresh out of the oven. So it’s really not particularly convenient to have for breakfast, though it’ll do for second breakfast or elevenses, if you get up early enough. I discovered a few years ago, though, that you can actually bake it the day before, leave it in the pan, then heat it back up for 10 minutes or so (long enough to make the sugar gooey again) in the morning. Everybody wins! Except for the monkeys, because I’m not sharing.
(adapted from AllRecipes.com)
Ingredients:
- 2 1/2 tsp active dry yeast
- 3 c all-purpose flour
- 1-2 tsp ground cinnamon, to taste
- 1 tsp salt
- 1/4 c white sugar
- 2 Tbsp butter, softened
- 1 c water
- 1/2 c butter
- 1 c packed brown sugar
Set bread machine to Dough. Put yeast, flour, cinnamon, salt, sugar, butter, and water in machine in the order recommended by the manufacturer. When dough is complete, turn out onto well-floured board and knead 10-20 times.
Preheat oven to 375°F. Butter bundt pan. In a small saucepan, melt together butter and brown sugar. Cut dough into 1″ cubes. Dredge cubes in butter/sugar mixture (Yes, it’s hot. Be careful.) and drop evenly into prepared bundt pan. Bake at 375°F for 20-25 minutes (until golden brown).
To serve immediately, place a plate over the top of the pan and invert them together. You may need to give the bottom of the pan a thump after you’ve got them flipped.
To serve the next morning, leave in pan and reheat at 375°F for 10-15 minutes (until butter/sugar mixture is gooey again). Serve as directed above.
No…more…pie…
January 3, 2012 § 1 Comment

Yeah, pie.
Wait! Yes! More pie!
At our house, instead of milk and cookies, Santa* gets beer and last year, pie. This year, Zack wanted to bake cookies for Santa (He specified chocolate — we made Chewy Caramel Cookies without the caramel centers. Continuing my baking slump, I managed to leave out the baking soda. They still came out okay, but a little dense and oddly textured.), while Becky wanted to do pie again. I asked her what kind of pie, and she said cherry. Now, I am not a fan of fruit pie as a general rule, Kit doesn’t particularly care for cherry pie, and Zack would probably eat about half a slice. So I suggested that perhaps Mommy could ask Santa what kind of pie he might want and we could make that. After she recovered from the idea that Mommy has Santa’s phone number, she agreed that was a fine idea.
Amazingly enough, Santa chose the easiest pie Mommy knows how to make: 5-minute Pudding Pie. The first time I made this pie, I was extremely skeptical. These sorts of recipes are always either incredibly messy (making the easy recipe not worth the hellish clean-up), horrible to actually eat, or just flat-out lies. 5-minute Pudding Pie literally takes about 5 minutes (if you’re using a prepared crust — it takes about 10 if you make your own crust), it’s delicious and creamy, and you use a single bowl, a whisk, a spoon, and a measuring cup (so, easy cleanup).
I did, of course, manage to screw it up by buying two different flavors of pudding so it wasn’t as nommy as it could have been. But it was edible and really, at this point, that’s a win. Usually it’s really delicious and creamy and people will think you’ve spent hours making a mousse pie. Oh! And you can use sugar/fat free varieties of all the ingredients! WIN!
* As many of you know, I have some conflict about the whole Santa Claus thing, because really [SPOILER], it’s a big lie we tell the kids and I feel pretty strongly about not lying to the kids. Which is not to say that I insist on smacking them in the face with the truth, but just straight up lying really leaves a bad taste in my mouth. I realized this year that if I could switch out “Daddy” (or “Mommy”) for “Santa” in the sentence, I can live with it. For everything else, I waffle between “I don’t know” and just outright changing the subject. So far, so good. Honestly, I’m kinda hoping my kids are smart enough to figure it out early and relieve me of this burden. I do plan to carry on the Santa tradition even after they’ve figured it out…”Santa” isn’t really about the fat guy in red velvet and fur to me, it’s about generosity and love and fun, and I’m totally un-conflicted about wanting my kids to have those things in their lives, always.
(from the Jell-O Pudding box)
Ingredients:
- 1 crumb pie crust
- 1 1/4 skim milk, cold
- 2 3.5 oz pkgs instant pudding (whatever flavor you want your pie to be)
- 1 8oz tub whipped dessert topping, thawed
Combine milk, pudding, and half of whipped topping with whisk in a large bowl. Whisk for 1 minute (mixture will be thick). Spoon evenly into crust. Top with remaining whipped topping.
Serve immediately or refrigerate.
Taste&Create Two-fer
October 20, 2011 § 3 Comments

Preview of the noms
As I mentioned last week, I’ve been a bit under the weather…it’s a chronic problem we’re still trying to diagnose, yadda yadda yadda. But I was finally starting to feel better and damned if I didn’t get a nasty virus that laid me up for about a week. Now I finally seem to have beaten that down, so I’m going to blog about a whole buncha stuff and hopefully get a nice backlog of content ready to go.
First and foremost, though, I still owe my Taste&Create for September. I feel so bad about how late it is (almost a month!) — and also I had so much trouble picking just one recipe from The Bad Girl’s Kitchen — that I decided to make two of them: a pear crumb pie, and peanut butter cookies.
First up, the pear pie. This came out delicious…the crumb is outstanding, and I’ll probably substitute it for the crumb on my apple pies in the future, which is decent but not quite as nommy. Instead of the crust recipe included, I used my standard go-to butter pie crust, with the addition of some cinnamon and nutmeg. (This is one of my favorite things about making pie…customizing the pie crust so it accents the flavors in the pie.) I think I’ll try the included recipe next time, but I was getting a little fuzzy around the edges from meds, so decided to stick with what I know this time.
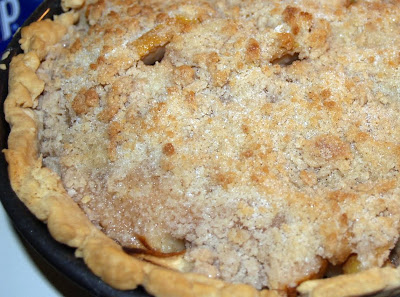
Mmmmmm...pie
The crust recipe I used (note: I made a double batch because I was also making a pecan pie. For a single crust, halve everything.):
- 1 c. butter
- 3 c. flour
- 1/2 tsp salt
- 7-8 Tbsp ice cold water/vodka/rum (this time I used rum, for the flavor)
- Any additional desired spices/flavoring
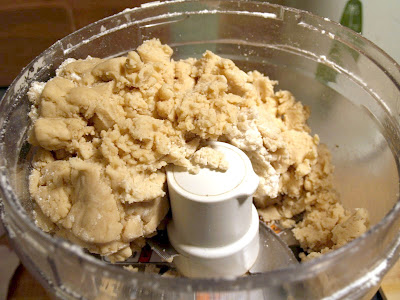
Stop it as it just comes together. If you keep it going, you'll end up with a ball of dough rather than the rather crumby mass you see here, but it completely overworks the dough and will make it very tough)
—————————————————————
Next, the cookies. These are AMAZING, but sadly only made about 2 dozen (so next time, I double the batch 🙂 ). I forgot to fork the last batch (to make the traditional cross-hatch pattern on the top), but it turns out I actually liked those better, because the granulated sugar remained on more of the surface. I did flatten them after removing from the oven, but I think they would have naturally flattened as they cooled anyhow. I think I might try these with non-nut butters one of these days for my nutter (allergic to nuts — thanks, CarolAnne!) friends.

COOOOOKIEEEEEEE!
Huge, huge apologies to Min, the coordinator of Taste&Create for my tardiness on this — it won’t happen again, I promise! This whole thing is just way too much fun.
