Make’n’Tell Day 2: I Did It All For the Cookie
February 3, 2014 § Leave a comment

Zack’s getting into the make action, too!
Right before Christmas last year, I did that thing where you all of a sudden decide that you need to bake All Of the Cookies and you only have like two days to do it (that happens to everyone, right, it’s not just me?). I wanted to make all my old standbys, but also felt like trying some new recipes, so I consulted my extensive library of cookbooks watched some shows on the Food Network asked my friends and family for recommendations headed to Pinterest. I found a couple of things to try, and for the most part they were pretty successful, but Becky went absolutely gaga for these chocolate chip toffee cookie strips. She’s been nagging asking me to make more ever since, and I thought they’d be a great share for Make’n’Tell.
Not only are these cookies delicious, but I get to use my new favorite technique for rolling out the dough. Instead of putting it between two sheets of wax paper or whatever, you put it in a Ziploc and leave about 1/2″ open at the top for the rest of the air to escape. Then you just roll your dough out inside the bag, and cut the bag open when you’re done. No muss, no fuss.
Chocolate Chip Toffee Cookie Strips

No, I did not eat all of these after taking the picture. Not all at once, anyhow.
Ingredients:
- 1 c. butter, softened
- 2/3 c. packed brown sugar
- 1/2 c. granulated sugar
- 1 egg
- 1 egg yoke
- 2 tsp vanilla extract
- 2 c. flour
- 1/2 tsp baking bowder
- 1/2 tsp salt
- 1 1/3 c. semi-sweet chocolate chips
- 2/3 c. toffee chips
Preheat oven to 350°. Line two cookie sheets with parchment paper.
Cream butter and sugars together in mixer.
Add eggs and vanilla.
Add flour, baking powder, and salt, mixing until thoroughly combined.
With a wooden spoon, stir in chocolate and toffee chips.
Take half of mixture and seal in a gallon size Ziploc bag, leaving about 1/2″ open. Roll dough flat (you’ll only be able to get it as flat as your chips are tall, so about 1/4″). Cut open bag and put dough on prepared cookie sheet. Repeat with 2nd half of dough.
Taste&Create Two-fer
October 20, 2011 § 3 Comments

Preview of the noms
As I mentioned last week, I’ve been a bit under the weather…it’s a chronic problem we’re still trying to diagnose, yadda yadda yadda. But I was finally starting to feel better and damned if I didn’t get a nasty virus that laid me up for about a week. Now I finally seem to have beaten that down, so I’m going to blog about a whole buncha stuff and hopefully get a nice backlog of content ready to go.
First and foremost, though, I still owe my Taste&Create for September. I feel so bad about how late it is (almost a month!) — and also I had so much trouble picking just one recipe from The Bad Girl’s Kitchen — that I decided to make two of them: a pear crumb pie, and peanut butter cookies.
First up, the pear pie. This came out delicious…the crumb is outstanding, and I’ll probably substitute it for the crumb on my apple pies in the future, which is decent but not quite as nommy. Instead of the crust recipe included, I used my standard go-to butter pie crust, with the addition of some cinnamon and nutmeg. (This is one of my favorite things about making pie…customizing the pie crust so it accents the flavors in the pie.) I think I’ll try the included recipe next time, but I was getting a little fuzzy around the edges from meds, so decided to stick with what I know this time.
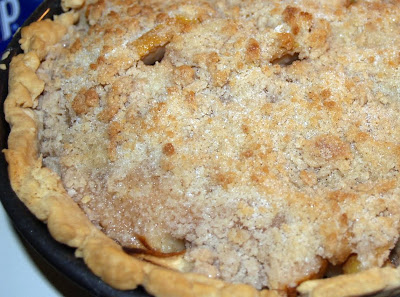
Mmmmmm...pie
The crust recipe I used (note: I made a double batch because I was also making a pecan pie. For a single crust, halve everything.):
- 1 c. butter
- 3 c. flour
- 1/2 tsp salt
- 7-8 Tbsp ice cold water/vodka/rum (this time I used rum, for the flavor)
- Any additional desired spices/flavoring
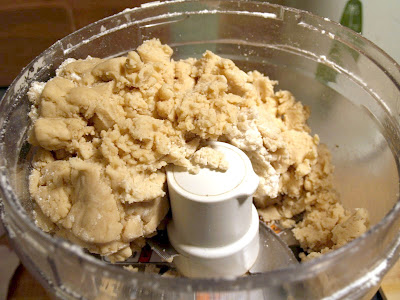
Stop it as it just comes together. If you keep it going, you'll end up with a ball of dough rather than the rather crumby mass you see here, but it completely overworks the dough and will make it very tough)
—————————————————————
Next, the cookies. These are AMAZING, but sadly only made about 2 dozen (so next time, I double the batch 🙂 ). I forgot to fork the last batch (to make the traditional cross-hatch pattern on the top), but it turns out I actually liked those better, because the granulated sugar remained on more of the surface. I did flatten them after removing from the oven, but I think they would have naturally flattened as they cooled anyhow. I think I might try these with non-nut butters one of these days for my nutter (allergic to nuts — thanks, CarolAnne!) friends.

COOOOOKIEEEEEEE!
Huge, huge apologies to Min, the coordinator of Taste&Create for my tardiness on this — it won’t happen again, I promise! This whole thing is just way too much fun.
Sometimes I Even Amaze Myself
September 15, 2011 § Leave a comment
The other day I bought a bag of these:
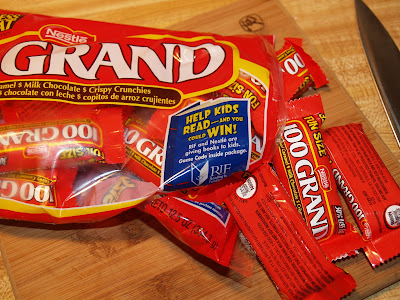
My absolute, hands down favorite candy bars EVAH.
so that I could make these delicious sounding cupcakes. But then I haven’t been in the mood to make cupcakes lately, and I had a cookie-baking mood come over me, so I decided to chop up the bars and use them in cookies instead! Absolutely brilliant, though I had to tweak the dough recipe a skosh to allow for the extra caramel.

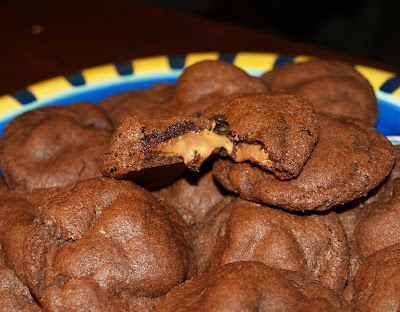
C is for cookie!
You definitely want to bake these on parchment paper — even in the spots where the caramel bubbles out the sides it won’t stick as long as you give it a few minutes to cool. Have I told you about how parchment paper is my new favorite thing? About 6 months ago I was baking a batch of cookies and for some reason they were sticking really badly to the sheet. I keep meaning to get a silpat but then forgetting, so I figured I would just have cookie pieces instead of cookies out of that batch. Then I figured I’d give parchment paper a try (only because I happened to have some on hand) and OMG it’s like magic! They just slip right off the paper! I might still get a couple of silpats, just because I like the idea of being able to prep several sheets at once, but seriously, people — parchment paper. Don’t bake without it.
Recipe
Ingredients:
- 1 c. unsalted butter, at room temp.
- 3/4 c. granulated sugar
- 3/4 c. brown sugar, packed
- 2 eggs
- 1 tsp vanilla
- 2 1/2 c. flour
- 1 tsp baking soda
- 1/2 tsp salt
- 5 oz. Ghirardelli milk chocolate chips
- 1 bag Fun Size 100 Grand bars (about 20 bars, I think, so you could also get 10 regular size candy bars)
Preheat oven to 375°. Cream butter and sugars together. Add eggs and vanilla, blending thoroughly. Add 1 c. of the flour, the baking soda, and the salt. When thoroughly mixed, add remaining flour. Beat on medium high speed for about a minute. Chop 100 Grand bars (Note: This is much, much easier to do if you cut them lengthwise first and then slice across the width to make approximately chip-sized bits). Add 100 Grand bar bits and chocolate chips to dough, mixing thoroughly. Drop spoonfuls onto parchment paper lined cookie sheet.
Bake at 375º for 8-9 minutes, until edges are just brown. Remove from oven and cool on cookie sheet 5-10 minutes, until any leaky caramel is solid. Transfer to wire rack to finish cooling.
Smooth Like Billy Dee Williams
August 11, 2011 § 1 Comment
Or like, you know, a smoothie. I haven’t given y’all a recipe for awhile now, mostly because it’s been too damn hot to bake, and baking’s really mostly what I do. But, here’s a recipe that’s perfect for the hot weather and super fast and easy to boot. My favorite thing about this smoothie is that you can use pretty much any juice, yogurt, and frozen berries you have on hand. The one in the picture was made with strawberries, lemonade, a little orange juice, and plain yogurt. I love using the mixed berries with OJ or mango juice, too. Pretty much anything goes here.

Works Every Time!
Ingredients:
- 2/3 c. yogurt (I just use plain, but you can really use whatever you have on hand if you think the flavor will work.)
- 2/3 – 1 c. juice (Again, whatever you have hanging around that you like is fine.)
- 1 1/2 c. frozen berries (Really feel like I’m repeating myself at this point, but use what you like)
Place all ingredients in blender*. Blend until smooth. If your smoothie is too thick, add more juice. If it’s too thin, add more yogurt. Serve and enjoy.
*I have one of these fancy-schmancy personal smoothie makers and I absolutely love it. Can’t recommend it highly enough. If you get one of these, just fill the berries up to the “Frozen ingredients” max line.
Not a Walking Carpet, but still Chewy
July 14, 2011 § 1 Comment
(See what I did there?) Back in the olden days, when not everyone had one of these fancy blog-thingies and in fact, hardly anyone who wasn’t some sort of supergeek even drove on the Internet Superhighway (remember that?) you could subscribe to these things called “newsgroups”.* Being a fairly geeky, cutting edge kind of gal, I joined several. Many of them were dedicated to recipes — you may have noticed I like to dabble a little in the kitchen. The following recipe came from one of those long-forgotten (by me, anyhow) recipe groups. If anyone knows the original source, I’m happy to add the info.
I cannot even tell you how glad I still have some of these so I can go eat them after looking at this picture. NOM.
A note before I pass this one along. It is very simple to make, but it is also a giant pain in the ass. The results are worth it, but I generally save these cookies for people who are very special to me, or who have something I want very badly.
*Yes, I know newsgroups are still around. But most people who joined the interwebs after, say, Y2K probably don’t. Work with me here, people.
Recipe
Makes about 4 dozen
Ingredients:
- 1 c. butter, softened
- 1 c. granulated sugar
- 1 c. packed brown sugar
- 2 eggs
- 2 tsp vanilla extract
- 2 1/4 c. all purpose flour
- 1 tsp baking soda
- 3/4 c. cocoa
- app. 48 Rolos (A note on the Rolos: it’s usually cheaper to buy them buy the bag, but then you have to shuck them as they are wrapped individually. If you buy them by the roll, you save yourself that step. The choice is yours.)
Cream butter and sugars together until smooth. Add eggs and vanilla, and beat until fully incorporated. In a separate bowl, combine flour, baking soda, and cocoa. Gradually add to butter mixture, beating well. (Seriously, you want to do this very gradually, or you will end up wearing much of the cocoa and flour.) Cover and chill for at least two hours (I usually do it overnight — you want it to be really chilled). Remove wrappers from Rolos if necessary (see note above) and chill them as well.
Preheat oven to 375F. Using a spoon, scoop out enough dough to cover one Rolo. Roll dough into a ball around Rolo and place on cookie sheet. Repeat until your cookie sheet is full, placing cookies about an inch apart. Bake for 8 minutes. remove from oven and let cool on cookie sheet for 2 minutes, then transfer to wire rack to cool completely. While each sheet is baking, put remaining dough and Rolos back into the refrigerator. If it is particularly warm in your kitchen, you may even need to put the dough in the freezer — it’s really almost impossible to work with if it’s even a little soft. (Heh. TWSS.)
