Make’n’Tell Day 2: I Did It All For the Cookie
February 3, 2014 § Leave a comment

Zack’s getting into the make action, too!
Right before Christmas last year, I did that thing where you all of a sudden decide that you need to bake All Of the Cookies and you only have like two days to do it (that happens to everyone, right, it’s not just me?). I wanted to make all my old standbys, but also felt like trying some new recipes, so I consulted my extensive library of cookbooks watched some shows on the Food Network asked my friends and family for recommendations headed to Pinterest. I found a couple of things to try, and for the most part they were pretty successful, but Becky went absolutely gaga for these chocolate chip toffee cookie strips. She’s been nagging asking me to make more ever since, and I thought they’d be a great share for Make’n’Tell.
Not only are these cookies delicious, but I get to use my new favorite technique for rolling out the dough. Instead of putting it between two sheets of wax paper or whatever, you put it in a Ziploc and leave about 1/2″ open at the top for the rest of the air to escape. Then you just roll your dough out inside the bag, and cut the bag open when you’re done. No muss, no fuss.
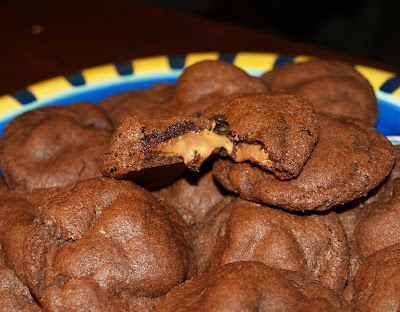
Chocolate Chip Toffee Cookie Strips

No, I did not eat all of these after taking the picture. Not all at once, anyhow.
Ingredients:
- 1 c. butter, softened
- 2/3 c. packed brown sugar
- 1/2 c. granulated sugar
- 1 egg
- 1 egg yoke
- 2 tsp vanilla extract
- 2 c. flour
- 1/2 tsp baking bowder
- 1/2 tsp salt
- 1 1/3 c. semi-sweet chocolate chips
- 2/3 c. toffee chips
Preheat oven to 350°. Line two cookie sheets with parchment paper.
Cream butter and sugars together in mixer.
Add eggs and vanilla.
Add flour, baking powder, and salt, mixing until thoroughly combined.
With a wooden spoon, stir in chocolate and toffee chips.
Take half of mixture and seal in a gallon size Ziploc bag, leaving about 1/2″ open. Roll dough flat (you’ll only be able to get it as flat as your chips are tall, so about 1/4″). Cut open bag and put dough on prepared cookie sheet. Repeat with 2nd half of dough.
Mmmmm…Sweet and Salty
October 30, 2012 § Leave a comment
Let’s be clear: I am not one for salting things. I don’t believe I have ever used a restaurant salt shaker in my life, and I generally halve the salt called for in recipes because it always seems like a bit too much to me. I think the whole “salted caramel” trend that’s been going around lately is an abomination against caramel. But…but. Chocolate covered potato chips are one of my very favorite treats. And I do dig a nice chocolate-cashew combo. So when I came across this recipe for chow mein noodles mixed with cashews and covered in chocolate, I decided to give it a shot. It’s fast, easy, and delicious – definitely a keeper.
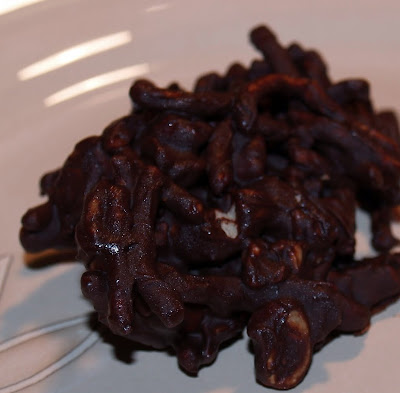
So, so nommy.
Ingredients:
- 1 c. bittersweet chocolate chips (the original recipe calls for 3 part chocolate chips to 1 part butterscotch – I didn’t have butterscotch so I just used all chocolate)
- 1 c. chow mein noodles (maybe a little more – just throw the whole can in)
- 1 c. cashews
Line a cookie sheet with waxed paper. Melt chocolate (I used my fondue pot, but you can use your microwave or double boiler). Mix in noodles, then cashews. Deposit spoonfuls of mixture on prepared cookie sheet and put in fridge until firm.
It’s a Truffle Job, but Somebody’s Gotta Do It
July 24, 2012 § Leave a comment
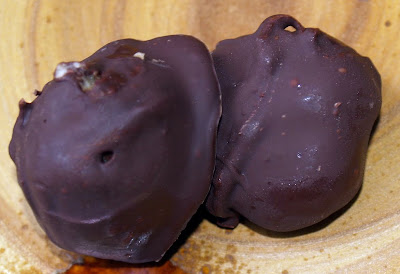
The Grasshopper Truffles I told you about last week were so delish that when I came across this recipe for chocolate chip cookie dough truffles, I didn’t hesitate.

Tasty little bites!
Now, this is a vegan recipe and as such, calls for vegan butter. I am not vegan (you may have noticed) and as such, do not have vegan butter on hand generally. So I used regular ol’ butter. It’s an egg-free recipe, so it’s safe to eat the raw cookie dough. However, the lack of eggs means the cookie dough is a little less rich than I’m used to. I think next time maybe I’ll experiment with using egg beaters. This recipe also uses only brown sugar, as opposed to the combo of brown and white in my regular cookie recipe, and I think that might be flattening the flavor as well. So, this one I’ll tweak a bit before posting my version of the recipe. In the meantime, the original is pretty darn tasty — give it a try!
Patience, Young Grasshopper
July 12, 2012 § 1 Comment
Pinterest is killing my waistline, I swear. Okay, also Foodbuzz and Foodgawker, but if it wasn’t for Pinterest I wouldn’t have anywhere to store all those yummy looking recipes. With pictures. So as soon as I go and look I am reminded of why I wanted to make the tasties in the first place. Such was the case with this recipe for Grasshopper Truffles. Each little ball is a mouthful of chocolate-minty delicious heaven.
Concentrated nom, coated in chocolate for extra nomminess.
I did modify the original recipe a bit…I found that the ratio of cream cheese to cookie was really high, so I adjusted that. I went with the straight up cream cheese rather than the frosting, and I’m glad I did…I think they’d’ve definitely been too sweet for me otherwise. And obviously, I didn’t use the sprinkles. I also didn’t use the mint extract and again, I’m glad I didn’t: I think it would have been overkill.
Here’s my tip for easy chocolate dipping: use chocolate chips in an electric fondue pot. Just set it to warm, as if you were going to actually fondue. Have your cookie sheet with waxed paper handy, and just pop the balls down on the paper as you take them out of the pot. Easy-peasy and makes clean-up a breeze, too. As tempting as it is to dump a bunch in and roll them around, resist. You’ll only end up melting them. One at a time is the way to go with these (that rule only applies to the dipping part, not the eating part).
Ingredients:
- 1 8oz package cream cheese, softened
- 1 box Girl Scout Thin Mint cookies
- About a cup of whatever chocolate chips you have on hand (I used a mix of bittersweet and milk, because that’s what I had)
Crumb the cookies in the food processor. You probably don’t want to add them all at once, and if they’re still a wee bit chunky, that’s okay. You don’t really want any chunks bigger than, say, a sunflower seed. Add the cream cheese and pulse until mixture is uniform. Chill mixture for about an hour.
After mixture is chilled, roll into small (about 1″) balls and place on a cookie sheet lined with wax paper.
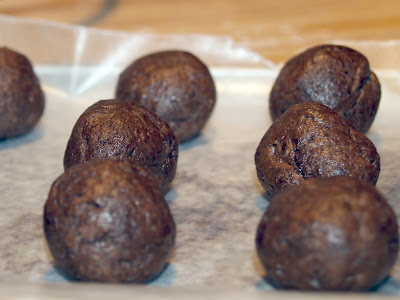
Pre-dipping…they’re kind of a gross dark taupe color. Cover them with delicious chocolate, stat!
Pop them back in the fridge for 30 minutes to an hour, depending on how soft the dough got while you were rolling them. You want them to be nice and firm and chilly for this next step, otherwise they’ll fall apart.
Melt chocolate in fondue pot (or using other method of your choice, but I promise, the fondue pot is really awesome). Roll chilled balls, one at a time, in melted chocolate, then place back on wax paper-lined cookie sheet. When you’ve dipped all the balls, put them back in the fridge until the chocolate hardens.
We Have No Banana Today
January 17, 2012 § Leave a comment
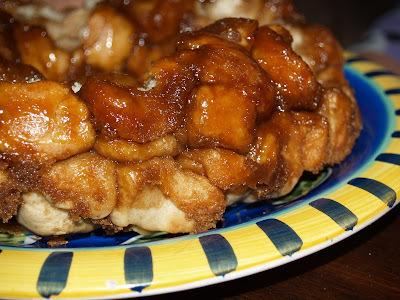
It's so good I failed to take a picture until we'd already eaten most of it. I was busy stuffing my face.
Even Wikipedia doesn’t know why it’s called Monkey Bread. It’s not made of monkeys and doesn’t contain bananas or anything else monkey-related, but it’s definitely delicious. Also, it’s kinda fun to make and totally fun to eat. I used to not make it often, because it’s a yeast dough so it takes a couple hours to make the dough and then another hour or so to prep and bake the bread. And it’s really best fresh out of the oven. So it’s really not particularly convenient to have for breakfast, though it’ll do for second breakfast or elevenses, if you get up early enough. I discovered a few years ago, though, that you can actually bake it the day before, leave it in the pan, then heat it back up for 10 minutes or so (long enough to make the sugar gooey again) in the morning. Everybody wins! Except for the monkeys, because I’m not sharing.
(adapted from AllRecipes.com)
Ingredients:
- 2 1/2 tsp active dry yeast
- 3 c all-purpose flour
- 1-2 tsp ground cinnamon, to taste
- 1 tsp salt
- 1/4 c white sugar
- 2 Tbsp butter, softened
- 1 c water
- 1/2 c butter
- 1 c packed brown sugar
Set bread machine to Dough. Put yeast, flour, cinnamon, salt, sugar, butter, and water in machine in the order recommended by the manufacturer. When dough is complete, turn out onto well-floured board and knead 10-20 times.
Preheat oven to 375°F. Butter bundt pan. In a small saucepan, melt together butter and brown sugar. Cut dough into 1″ cubes. Dredge cubes in butter/sugar mixture (Yes, it’s hot. Be careful.) and drop evenly into prepared bundt pan. Bake at 375°F for 20-25 minutes (until golden brown).
To serve immediately, place a plate over the top of the pan and invert them together. You may need to give the bottom of the pan a thump after you’ve got them flipped.
To serve the next morning, leave in pan and reheat at 375°F for 10-15 minutes (until butter/sugar mixture is gooey again). Serve as directed above.
No…more…pie…
January 3, 2012 § 1 Comment

Yeah, pie.
Wait! Yes! More pie!
At our house, instead of milk and cookies, Santa* gets beer and last year, pie. This year, Zack wanted to bake cookies for Santa (He specified chocolate — we made Chewy Caramel Cookies without the caramel centers. Continuing my baking slump, I managed to leave out the baking soda. They still came out okay, but a little dense and oddly textured.), while Becky wanted to do pie again. I asked her what kind of pie, and she said cherry. Now, I am not a fan of fruit pie as a general rule, Kit doesn’t particularly care for cherry pie, and Zack would probably eat about half a slice. So I suggested that perhaps Mommy could ask Santa what kind of pie he might want and we could make that. After she recovered from the idea that Mommy has Santa’s phone number, she agreed that was a fine idea.
Amazingly enough, Santa chose the easiest pie Mommy knows how to make: 5-minute Pudding Pie. The first time I made this pie, I was extremely skeptical. These sorts of recipes are always either incredibly messy (making the easy recipe not worth the hellish clean-up), horrible to actually eat, or just flat-out lies. 5-minute Pudding Pie literally takes about 5 minutes (if you’re using a prepared crust — it takes about 10 if you make your own crust), it’s delicious and creamy, and you use a single bowl, a whisk, a spoon, and a measuring cup (so, easy cleanup).
I did, of course, manage to screw it up by buying two different flavors of pudding so it wasn’t as nommy as it could have been. But it was edible and really, at this point, that’s a win. Usually it’s really delicious and creamy and people will think you’ve spent hours making a mousse pie. Oh! And you can use sugar/fat free varieties of all the ingredients! WIN!
* As many of you know, I have some conflict about the whole Santa Claus thing, because really [SPOILER], it’s a big lie we tell the kids and I feel pretty strongly about not lying to the kids. Which is not to say that I insist on smacking them in the face with the truth, but just straight up lying really leaves a bad taste in my mouth. I realized this year that if I could switch out “Daddy” (or “Mommy”) for “Santa” in the sentence, I can live with it. For everything else, I waffle between “I don’t know” and just outright changing the subject. So far, so good. Honestly, I’m kinda hoping my kids are smart enough to figure it out early and relieve me of this burden. I do plan to carry on the Santa tradition even after they’ve figured it out…”Santa” isn’t really about the fat guy in red velvet and fur to me, it’s about generosity and love and fun, and I’m totally un-conflicted about wanting my kids to have those things in their lives, always.
(from the Jell-O Pudding box)
Ingredients:
- 1 crumb pie crust
- 1 1/4 skim milk, cold
- 2 3.5 oz pkgs instant pudding (whatever flavor you want your pie to be)
- 1 8oz tub whipped dessert topping, thawed
Combine milk, pudding, and half of whipped topping with whisk in a large bowl. Whisk for 1 minute (mixture will be thick). Spoon evenly into crust. Top with remaining whipped topping.
Serve immediately or refrigerate.
Smooth Like Billy Dee Williams
August 11, 2011 § 1 Comment
Or like, you know, a smoothie. I haven’t given y’all a recipe for awhile now, mostly because it’s been too damn hot to bake, and baking’s really mostly what I do. But, here’s a recipe that’s perfect for the hot weather and super fast and easy to boot. My favorite thing about this smoothie is that you can use pretty much any juice, yogurt, and frozen berries you have on hand. The one in the picture was made with strawberries, lemonade, a little orange juice, and plain yogurt. I love using the mixed berries with OJ or mango juice, too. Pretty much anything goes here.

Works Every Time!
Ingredients:
- 2/3 c. yogurt (I just use plain, but you can really use whatever you have on hand if you think the flavor will work.)
- 2/3 – 1 c. juice (Again, whatever you have hanging around that you like is fine.)
- 1 1/2 c. frozen berries (Really feel like I’m repeating myself at this point, but use what you like)
Place all ingredients in blender*. Blend until smooth. If your smoothie is too thick, add more juice. If it’s too thin, add more yogurt. Serve and enjoy.
*I have one of these fancy-schmancy personal smoothie makers and I absolutely love it. Can’t recommend it highly enough. If you get one of these, just fill the berries up to the “Frozen ingredients” max line.
Not a Walking Carpet, but still Chewy
July 14, 2011 § 1 Comment
(See what I did there?) Back in the olden days, when not everyone had one of these fancy blog-thingies and in fact, hardly anyone who wasn’t some sort of supergeek even drove on the Internet Superhighway (remember that?) you could subscribe to these things called “newsgroups”.* Being a fairly geeky, cutting edge kind of gal, I joined several. Many of them were dedicated to recipes — you may have noticed I like to dabble a little in the kitchen. The following recipe came from one of those long-forgotten (by me, anyhow) recipe groups. If anyone knows the original source, I’m happy to add the info.
I cannot even tell you how glad I still have some of these so I can go eat them after looking at this picture. NOM.
A note before I pass this one along. It is very simple to make, but it is also a giant pain in the ass. The results are worth it, but I generally save these cookies for people who are very special to me, or who have something I want very badly.
*Yes, I know newsgroups are still around. But most people who joined the interwebs after, say, Y2K probably don’t. Work with me here, people.
Recipe
Makes about 4 dozen
Ingredients:
- 1 c. butter, softened
- 1 c. granulated sugar
- 1 c. packed brown sugar
- 2 eggs
- 2 tsp vanilla extract
- 2 1/4 c. all purpose flour
- 1 tsp baking soda
- 3/4 c. cocoa
- app. 48 Rolos (A note on the Rolos: it’s usually cheaper to buy them buy the bag, but then you have to shuck them as they are wrapped individually. If you buy them by the roll, you save yourself that step. The choice is yours.)
Cream butter and sugars together until smooth. Add eggs and vanilla, and beat until fully incorporated. In a separate bowl, combine flour, baking soda, and cocoa. Gradually add to butter mixture, beating well. (Seriously, you want to do this very gradually, or you will end up wearing much of the cocoa and flour.) Cover and chill for at least two hours (I usually do it overnight — you want it to be really chilled). Remove wrappers from Rolos if necessary (see note above) and chill them as well.
Preheat oven to 375F. Using a spoon, scoop out enough dough to cover one Rolo. Roll dough into a ball around Rolo and place on cookie sheet. Repeat until your cookie sheet is full, placing cookies about an inch apart. Bake for 8 minutes. remove from oven and let cool on cookie sheet for 2 minutes, then transfer to wire rack to cool completely. While each sheet is baking, put remaining dough and Rolos back into the refrigerator. If it is particularly warm in your kitchen, you may even need to put the dough in the freezer — it’s really almost impossible to work with if it’s even a little soft. (Heh. TWSS.)
Because you always want s’more!
June 8, 2011 § Leave a comment
I have a love/hate relationship with Twitter. It brings me so many awesome things that I want to make, both of the food and craft varieties (not to mention all of the cool articles I get from feeds like @NASA, @mashable, @arstechnica, @blastr, etc.) that sometimes I get a little overwhelmed. But sometimes, it brings me to something awesome that reminds me of something I’ve already done! The other day, I clicked on the link to this, which reminded me of my own super easy, no bake S’mores Pie recipe from last year. Here it is, for your nomming pleasure:

Recipe
- 1 graham cracker pie crust, baked*
- 1 bucket Two Bite Brownies
- 1/2 package mini marshmallows (or giant delicious ones cut into bite sized pieces)
- Chocolate syrup (I’m a Hershey’s girl, but use what you like)
Preheat oven to 350 deg.
Break brownies into large chunks (approximately quarters) and place evenly in pie crust. Cover with marshmallows. Place in oven for 7-10 minutes, until marshmallows are lightly browned. Let cool, then drizzle with chocolate syrup.
* I used a pre-made crust because I am ridiculously lazy. I found that it did not hold together at all well, and if you have any inclination at all to bake your own, definitely go with that. The crumbliness of the pre-made crust was not a deal breaker, but I’ll definitely make my own next time.
Note: The above is the original recipe I typed up last year. I actually did not re-read this recipe before I re-created it this time, and I should have. I again used a pre-made crust and it again crumbled. I also just popped it under the broiler this time, which browned the marshmallows but didn’t let them heat long enough to get nice and gooey. So, I strongly recommend foregoing the pre-made crust and the broiler. But really, it’s delicious either way.
