Photo-A-Day: Father
September 2, 2012 § Leave a comment
My kids have an awesome father. Who, incidentally, has a dog named Awesome.

Plan Z, or Fourth Time’s the Charm
April 24, 2012 § 1 Comment
Y’all, Zack’s birthday is in November. That’s how long this post has been waiting around for me to get my sh*t together and put the photos in and post it already. I feel much shame. The timing’s good, though, because Becky’s birthday is this week and she’s decided she doesn’t like cake that much, so we’re not doing a fancy cake for her birthday this year. Just brownies and Rice Krispie Treats, oh, and homemade mint chocolate chip ice cream. Recipes (such as they are) for the latter two will be shared soon. Swear.
I have established a tradition of baking awesome cakes for Becky for her birthday. Zack hasn’t ever requested anything particular, so he’s just gotten cake. This year, though, he decided he wanted a Thomas cake. No problem, I figured. I made the Millennium Freaking Falcon, after all. How hard can Thomas be? They even make cake pans in the shape of train engines! This was going to be, excuse the expression, a piece of cake.
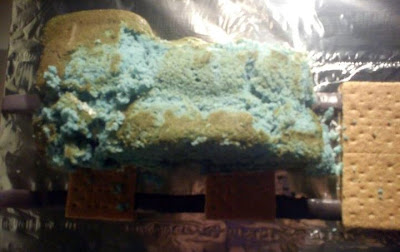
Zack’s party was Sunday afternoon. The plan was to bake the cake Friday night so it would be nice and cool for me to decorate Saturday. I considered using the yogurt cake recipe that I’ve had so much success with, but wasn’t sure if it would be structurally sound enough to hold the novelty shape. So I whipped up a box mix, added the blue food coloring (as requested by the birthday boy) and popped that sucker in the oven (after I figured out the pan — it’s two parts that snap together. Weird.). Seemed to come out okay — the tester came out clean — so I set it on the rack to cool as per the pan instructions.
After it had cooled I went to pop the pan apart and while the part under the tester hole was fine, much of the rest of it was raw batter. Failed cake #1. Saturday morning I hied myself to the store and bought another couple cake mixes. Mixed cake number two, poured batter into train pan — separated this time (with foil over the tester hole) — and back into the oven. Forgot to add food coloring — no good.

Batter, batter, no batter!
Open another box, mix/add food coloring/pour/bake. Finally, cakes bake through and are the right color. Sweet! Now, to decorate. So now I have to get the cakes together. I shave the center edges of each cake, slap on some frosting, and push them together. Success! For about four minutes. And then the structural integrity — or lack thereof — shows its ugly face and large pieces just start falling off.

I find your lack of structural integrity disturbing.
I try to stick them back on with frosting (because you can never have too much frosting, and incidentally, the frosting was homemade cream cheese frosting), but every time I get one piece stuck on, another one falls off. Eventually, I have what is basically a lump of frosting with some cake stuck on. It is clearly not going to stand up properly. Maybe I can just lay it down on the track? So it’ll be like a photo laid down flat?
Looking like the train wreck it is.
Right. Clearly, the train cake is just not going to happen. And now I’m beginning to doubt that I can make this happen at all. A Facebook friend pointed me to this alternative (love crowd sourcing!):

Cute, right?
and I was considering it, but my confidence was, frankly, a little low at that point. Also it had gotten to be about 9pm. So I decided I’d just buy a damn cake in the morning — I could just draw a Thomas on with frosting (have I mentioned that I love my frosting gun? Got it half price on clearance at Bed Bath and Beyond because the box was damaged.).
Off to the A&P and they actually had a Thomas cake!!! I was halfway to the checkout when I looked at the price and saw it was $27. Yeah, I ain’t paying 27 bucks to feed cake to a bunch of toddlers (yes, I ended up spending way more than that on cake mixes etc. You keep your logic to yourself.). I hemmed and hawed and finally decided to make the alternative cake. I grabbed yet another cake mix and some candy for the landscaping. Baked it, cut it decorated it (after spending a few minutes trying to figure out why the original didn’t feel quite right: take another look and tell me where that tunnel is coming from? Bespin?) and ended up with this:
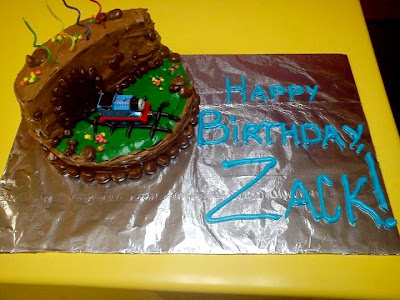
Choo choo!
Not too shabby, right? Zack was okay with it but not thrilled (I didn’t realize he’d already had a “landscape” Thomas cake at another birthday celebration or I would’ve figured out something else to do), but then it wasn’t really what he — or I, for that matter — was hoping for. Still, I’m not ashamed of it, and I got lots of compliments. The larger “stones” are Milk Duds, the smaller ones are Raisinets, and the patches of flowers are Nerds.
Found It on the Internet Friday #6
September 2, 2011 § Leave a comment
Yikes! Missed a couple weeks, didn’t I? I’ve been crazy busy — tell you all about it later. But for now, meet this week’s FIotI:
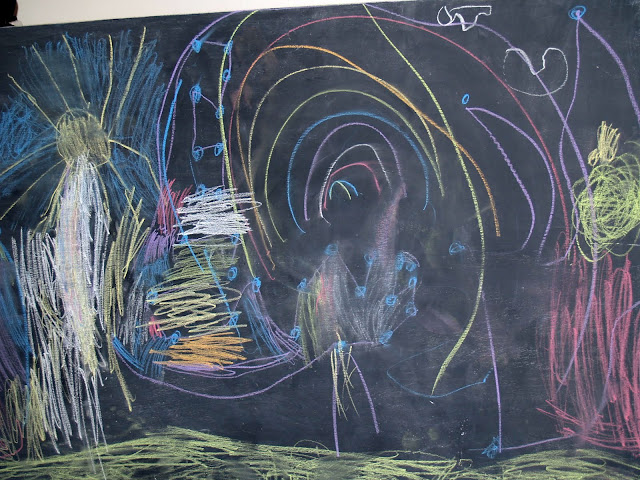
Artist credit goes to Becky and Zack
I don’t actually have a link to a particular project on the internet that inspired me for this one, but I’ve been seeing custom-made chalkboard surfaces of all varieties all over Etsy and assorted wedding blogs* and of course Martha Stewart (who has this nifty recipe for making your own color — how cool is that?).
So. This isn’t your run-of-the-mill little chalkboard. No, this is a door, painted with chalkboard paint. I thought about doing the aforementioned MS color-mixing thing, but I didn’t have a particular color in mind and for the amount of paint I needed, it was cheaper to just buy the quart of black (incidentally, they do now have a tint-able one available, but the color choices are limited).
Why a door, you ask? Well, I was using two of them for desk surface in my studio, and when I rearranged a few weeks ago I decided one was enough and I could use the other wall space more efficiently. So I had an extra one hanging around. They’re super-cheap, though — these are the interior hollow-core doors and run $20-30 depending on the width you get.

Those are Zack's legs, just to give you a sense of scale.
The painting itself was really easy — I “primed” with some extra trim paint I had laying around and then threw on two coats of the chalkboard paint. I went over it with the white chalk as instructed on the packaging to give it a “dust base” and then turned the kids loose on it with the multi-color chalk. Right now I’ve just got it on the floor leaning against the wall, but as they grow I’ll probably hang it for them. And I have a bunch of the paint left over, so expect to see more chalkboard-y stuff here in the future.

Gratuitous shot of adorable artists.
* No, I’m not planning a wedding. DIY wedding blogs have some of the coolest crafts going, I swear. Don’t give them a miss just because you’re not planning on tying the knot.
